Category Archives: Structure Synth

Creating a Raytracer for Structure Synth (Part III)

This post discusses some of the things I realised while coding the raytracer in Structure Synth and some thoughts about GPU raytracing.

Luxion

Back in October, I saw a presentation by Henrik Wann Jensen (known for his work on photon mapping and subsurface scattering) where he demonstrated the Keyshot renderer made by his company Luxion. It turned out to be a very impressive demonstration: the system was able to render very complex scenes (a car with a million polygons), with very complex materials (such as subsurface scattering) and very complex lighting, in real-time on a laptop.

After having downloaded a Keyshot renderer demo, I was able to figure out some of the tricks used to achieve this kind of performance.

  • Using panoramic HDRI maps as backgrounds: the use of a panoramic background image gives the illusion of a very complex scene at virtually no computational cost. The 3D objects in the scene even seem to cast shadows on this background image: something which can be done by adding an invisible ground floor. In most cases this simple hack works out quite nice.
  • Image Based Lighting: by using the panoramic HRDI maps to calculate the lighting as well, you achieve very complex and soft lighting, which of course matches the panoramic background. And you don’t have to setup complicated area lights or stuff like that.
  • Progressive rendering: images in Keyshot may take up to minutes before the rendering has converged, but you do not notice. Because Luxshot renders progressively you can immediately adjust your settings without having to wait for the system. This means the perceived rendering speed is much higher than in classic raytracers (such as POV-Ray).


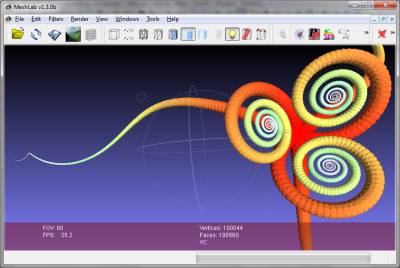
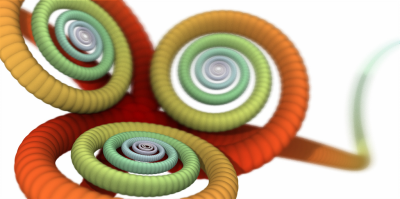
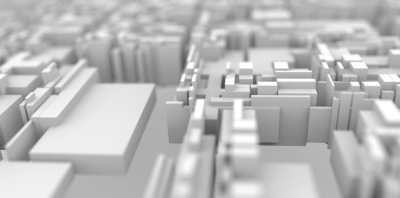
The above image is a Structure Synth model exported in OBJ format, and rendered in Keyshot.

Some of these ideas should be relatively easy to implement. Especially the idea of using panoramic maps as light sources is clever – setting up individual light sources in Structure Synth programmatically would be tedious, and the complex lighting from a panoramic scene is very convincing (at least in Keyshot).

Henrik Wann Jensen also made some interesting comments about GPU computing: essentially he was not very impressed, and seemed convinced that similar performance could be obtained on CPUs, if utilizing the resources properly.

Of course Wann Jensen may be somewhat biased here: after all Luxions biggest competitor (and former partner), Bunkspeed, use a hybrid GPU/CPU approach in their Bunkspeed Shot raytracer. The raytracing technology used here is a licensed version of Mental Images iray engine.

Having tried both raytracers, I must say Luxion’s pure CPU technique was by far the most impressive, but as I will discuss later, GPU raytracing may have other advantages. (And it is really difficult to understand why it should not be possible to benefit from using both CPU and GPU together).

If you haven’t tried Keyshot, it is definitely worth it: I never really liked integrated raytracing environments (such as Blender), because it almost always is so difficult to setup stuff like light sources and materials, but Keyshot is certainly a step forward in usability.

Physically Based Rendering

As I described in my previous post, I made many mistakes during the development of the Raytracer in Structure Synth. And all these mistakes could have been avoided, if I had started out by reading ‘Physically Based Rendering‘ by Matt Pharr and Greg Humphreys. But yet again – part of the fun is trying to figure out new ways to do things, instead of just copying other people.

I have only read fragments of it so far, but still I can wholeheartedly recommend it: even though I’m a physicist myself, I was surprised to see just how far you can get using physical principles to build a complete raytracing framework. It is a very impressive and consistent approach to introducing raytracing, and the book covers nearly all aspects of raytracing I could think of – except one minor thing: I would have loved to see a chapter on GPU raytracing, especially since both authors seem to have extensive experience with this topic.


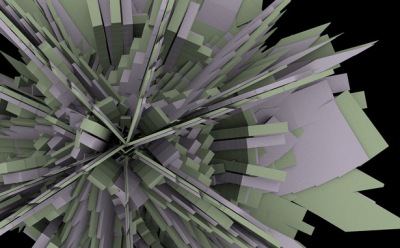
Microcity.pbrt – modeled by Mark Schafer

But I was flattered to see an image created with Structure Synth in the book – and their pbrt raytracer even has integration to Structure Synth!

GPU Based Rendering

Now, for the past months I’ve made a few experiments with GPU based rendering and generative systems using GLSL. And even though Henrik Wann Jensen may be right, and the performance gain of GPU’s may be somewhat exaggerated, they do have some advantages which are often ignored:

  • GPU programming is easy. If you want to achieve high performance on a CPU, you need to write complex multi-threaded code and do tricky low-level optimizations, such as inlined SSE instructions and custom memory management. On the other hand GLSL is very easy to write and understand and even comes with built-in support for matrices and vectors. Well, actually GPU programming can also be terrible hard: if you need to share memory between threads, or move data between the GPU and CPU, things can get very ugly (and you will need a more powerful API than GLSL). But for ’embarrassingly parallel’ problems – for instance if each pixel can be calculated independently – with simply, unshared memory access – GPU programming can be just as easy as for instance Processing.
  • Code can be compiled and uploaded to the GPU dynamically. In C++ or Java making a small change to one part of a program requires a recompilation and restart of the program. But with GLSL (and all other GPU API’s) you get a fast compiler you can use during run-time to create highly efficient multi-threaded code.

The combination of being easy, fast, and dynamic, makes GPU rendering wonderful for exploring many types of generative art systems. In fact, probably the biggest hurdle is to setup the boilerplate code required to start a GLSL program. And even though there are many nice tools out there (e.g. Pixel Bender) none of them are really suited for generative systems.

So, for the past month I’ve been working a bit on an integrated environment for exploring GPU accelerated pixel based systems, called Fragmentarium. It is still quite immature, but I plan to release a version (with binary builds) later this January.


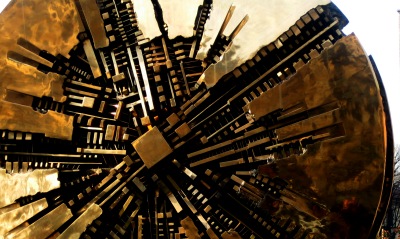
Fragmentarium example

This also means that I will use most of my spare time on this project the coming months, but some of the ideas will probably find use in Structure Synth as well.

Creating a Raytracer for Structure Synth (Part II)

When I decided to implement the raytracer in Structure Synth, I figured it would be an easy task – after all, it should be quite simple to trace rays from a camera and check if they intersect the geometry in the scene.

And it turned out, that it actually is quite simple – but it did not produce very convincing pictures. The Phong-based lighting and hard shadows are really not much better than what you can achieve in OpenGL (although the spheres are rounder). So I figured out that what I wanted was some softer qualities to the images. In particular, I have always liked the Ambient Occlusion and Depth-of-field in Sunflow. One way to achieve this is by shooting a lot of rays for each pixel (so-called distributed raytracing). But this is obviously slow.

So I decided to try to choose a smaller subset of samples for estimating the ambient occlusion, and then do some intelligent interpolation between these points in screen space. The way I did this was to create several screen buffers (depth, object hit, normal) and then sample at regions with high variations in these buffers (for instance at every object boundary). Then followed the non-trivial task of interpolating between the sampled pixels (which were not uniformly distributed). I had an idea that I could solve this by relaxation (essentially iterative smoothing of the AO screen buffer, while keeping the chosen samples fixed) – the same way the Laplace equation can be numerically solved.

While this worked, it had a number of drawbacks: choosing the condition for where to sample was tricky, the smoothing required many steps to converge, and the approach could not be easily multi-threaded. But the worst problem was that it was difficult to combine with other stuff, such as anti-alias and depth-of-field calculations, so artifacts would show up in the final image.

I also played around with screen based depth-of-field. Again I thought it would be easy to apply a Gaussian blur based on the z-buffer depth (of course you have to prevent background objects from blurring the foreground, which complicates things a bit). But once again, it turned out that creating a Gaussian filter for each particular depth actually gets quite slow. Of course you can bin the depths, and reuse the Gaussian filters from a cache, but this approach got complicated, and the images still displayed artifacts. And a screen based method will always have limitations: for instance, the blur from an object hidden behind another object will never be visible, because the object is not part of the screen buffers.

So in the end, I ended up discarding all the hacks, and settled for the much more satisfying solution of simply using a lot of rays for each pixel.

This may sound very slow: after all you need multiple rays for anti-alias, multiple rays for depth-of-field, multiple rays for ambient occlusion, for reflections, and so forth, which means you might end up with a combinatorial explosion of rays per pixel. But in practice there is a nice shortcut: instead of trying all combinations, just choose some random samples from all the possible combinations.

This works remarkably well. You can simulate all these complex phenomena with a reasonably number of rays. And you can use more clever sampling strategies in order to reduce the noise (I use stratified sampling in Structure Synth). The only drawback is, that you need a bit of book-keeping to prepare your stratified samples (between threads) and ensure you don’t get coherence between the different dimensions you sample.

Another issue was how to accelerate the ray-object intersections. This is a crucial part of all raytracers: if you need to check your rays against every single object in the scene, the renders will be extremely slow – the rendering time will be proportional to the number of objects. On the other hand spatial acceleration structures are often able to render a scene in a time proportional to the logarithm of the number of objects.

For the raytracer in Structure Synth I chose to use a uniform grid (aka voxel stepping). This turned out to be a very bad choice. The uniform grid works very well, when the geometry is evenly distributed in the scene. But for recursive systems, objects in a scene often appear at very different scales, making the cells in the grid very unevenly populated.

Another example of this is, that I often include a ground plane in my Structure Synth scenes (by using a flat box, such as “{ s 1000 1000 0.1 } box”). But this will completely kill the performance of the uniform grid – most objects will end up in the same cell in the grid, and the acceleration structure gets useless. So in general, for generative systems with different scales, the use of a uniform grid is a bad choice.

Not that is a lot of stuff, that didn’t work out well. So what is working?

As of now the raytracer in Structure Synth provides a nice foundation for things to come. I’ve gotten the multi-threaded part set correctly up, which includes a system for coordinating stratified samples. Each thread have its own (partial) screen space buffer, which means I can do progressive rendering. This also makes it possible to implement more complex filtering (where the filtered samples may contribute to more than one pixel – in which case the raytracer is not embarrassingly parallel anymore).

What is missing?

Materials. As of now there is only very limited control of materials. And things like transparency doesn’t work very well.

Filtering. As I mentioned above, the multi-threaded renderer supports working with filters, but I haven’t included any filters in the latest release. My first experiments (with a Gaussian filter) were not particularly successful.

Lighting. As of now the only option is a single, white, point-like light source casting hard shadows. This rarely produce nice pictures.

In the next post I’ll talk a bit about what I’m planning for future versions of the raytracers.

Structure Synth 1.5.0 (Hinxton) Released

It has been more than a year since the last release of Structure Synth, but now a new version is finally ready.

The biggest additions are the new raytracer and the scripting interface for animations. The raytracer is not an attempt to create a feature complete renderer, but it makes it possible to create images in a quality acceptable for printing without the complexity of setting up a scene in a conventional raytracer.

New features:

Minor updates:

  • Added support for preprocessor generated random numbers (uniform distributed).
  • Added ‘show coordinate system’ option.
  • Added ‘Autosave Eisenscript’ option to the Template Export Dialog. The autosaved script includes the random seed and camera settings.
  • Context menu with command help in editor window.
  • Proper sorting of transparent OpenGL objects.
  • Added a patch by François Beaune to support Appleseed.
  • GUI Refactoring.

Binaries for Windows (XP, Vista, and 7) and Mac OS X (10.4 and later, universal app). Linux is source only.

As something new, there is now an installer for Windows. It is still possible to just unzip the archived executable, but the Windows installer offers file associations for EisenScript files.

Comments

The raytracer and JavaScript interface are described in more details in the blog posts linked to above.

The OBJ exporter is simpe to use: Choose ‘Export | OBJ Export…’ from the menu. Since the OBJ format does not support spheres, these must be polygonized before export: it is possible to adjust the resolution for this. OBJ does not directly support colors either, so I’ve made it possible to group the OBJ output into sections according to either color or tags (or both). The group and material will be named after the OpenGL color, e.g.


g #f1ffe3
usemtl #f1ffe3
v 8.27049 2.4216 7.09626
...

Another new feature which probably requires a bit of explanation is the preprocessor generated random numbers. They can be used using the following syntax:


10 * { x 3 } 1 * { s random[1,3] } box

The above fragment will produce ten boxes, with a random size between 1 and 3. But notice that each box will have the same size: the ‘random[1,3]’ is substituted at compile-time, not run-time.

I’ve had several request for some way to produce random variation each time a rule is called, but this would require rather large changes to Structure Synth, since the EisenScript program is compiled into a binary structure at compile time, and I would essentially need to turn the builder into a parser to accomodate this (which would be slow).

Well, that’s about it.

Download instructions at:
http://structuresynth.sourceforge.net/download.php

For more information see:
http://structuresynth.sourceforge.net/

Scripting in Structure Synth

I’ve added a JavaScript interface to Structure Synth. This makes it possible to automate and script animations from within Structure Synth. Here is an example:


(Image links to YouTube video)

The JavaScript interface will be part of the next version of Structure Synth (which is almost complete), but it is possible to try out the new features right now, by checking out the sources from the Subversion repository.

The rest of this post shows how to use the JavaScript interface.

Continue reading Scripting in Structure Synth

MeshLab with Structure Synth integration

MeshLab is a powerful open-source system for manipulation of 3D meshes. It supports a gazillion of 3D formats, and many types of filters and operators for remeshing, cleaning, and modifying 3D structures.

The latest versions of MeshLab (the 1.3.0 Beta) now also supports EisenScript directly.

You can directly import EisenScript (.es) files using the standard ‘File | Open’ dialog, or you can choose ‘Filters | Create New Mesh Layer | Structure Synth Mesh Creation’ and paste your EisenScript into the text edit field.

Since MeshLab directly compiles in the Structure Synth code, the resulting structures should be 100% compatible.

This opens up a lot of possibilities for preparing Structure Synth objects for use in other software, such as third party raytracers. I also think it may be possible to prepare a 3D structure in a format suitable for 3D printing (where there are special restrictions on the geometry), but I’ll have to look into this.

There is a vast amount of commands and operators to explore in MeshLab, and I think this integration is a great step forward for using Structure Synth in a wider context.

Creating a Raytracer for Structure Synth

Updated november 17th, 2011

Structure Synth has quite flexible support for exporting geometry to third-party raytracers, but even though I’ve tried to make it as simple as possible, the Template Export system can be difficult to use. It requires knowledge of the scene description format used by the target raytracer, and of the XML format used by the templates in Structure Synth. Besides that, exporting and importing can be slow when dealing with complicated geometry.

So I decided to implement a simple raytracer inside Structure Synth. I probably could have integrated some existing open-source renderer, but I wanted to have a go at this myself. The design goal was to create something reasonably fast, aiming for interesting, rather than natural, results.

The first version of the raytracer is available now in SVN, and will be part of the next Structure Synth release.

How to use the raytracer

The raytracer has a few settings which can be controlled by issuing ‘set’ commands in the EisenScript.

The following is a list of commands with their default values given as argument:

set raytracer::light [0.2,0.4,0.5]

Sets the position of a light in the scene. If a light source position is not specified, the default position is a light placed at the lower, left corner of the viewport. Notice that only a single light source is possible as of now. This light source controls the specular and diffuse lightning, and the hard shadow positions. The point light source model will very likely disappear in future versions of Structure Synth – I’d prefer environment lightning or something else that is easier to setup and use.

set raytracer::shadows true

This allows you to toggle hard shadows on or off. The shadow positions are determined by the light source position above.


Rendering without and with anti-alias enabled

set raytracer::samples 6

This sets the number of samples per pixel. Notice the actual number of samples is the square of this argument, i.e. a value of 2 means 2×2 camera rays will be traced for each pixel. The default value is 6×6 samples for ‘Raytrace (in Window)’ and 8×8 samples for ‘Raytrace (Final)’. This may sound like a lot of samples per pixel, but the number of samples also control the quality of the depth-of-field or ambient occlusion rendering. If the image appears noisy, increase the sample count.


To the left, a render with a single Phong light source. To the right, the same picture using ambient occlusion

set raytracer::ambient-occlusion-samples 1

Ambient occlusion is a Global Illumination technique for calculating soft shadows based on geometry alone. Per default the number of samples is set to 1. This may not sound like a lot, but each pixel will be sampled multiple times courtesy of the ‘raytracer::samples’ count – this makes sense because the ‘raytracer::samples’ will be used to sample both the lens model (for anti-alias and depth-of-field) and the ambient occlusion. And when I get a chance to implement some better shader materials, the samples can also be used there as well. Notice, that as above, the number refers to samples per dimensions. Example: if ‘raytracer::ambient-occlusion-samples = 3’ and ‘raytracer::samples = 2’, a total of 3x3x2x2=36 samples will be used per pixel.


Depth-of-Field example

set raytracer::dof [0.23,0.2]

Enables Depth-Of-Field calculations. The first parameter determines the distance to the focal plane, in terms of the viewport coordinates. It is always a number between 0 and 1. The second parameter determines how blurred objects away from the focal plane appear. Higher values correspond to more blurred foregrounds and backgrounds.

Hint: in order to get the viewport plane distance to a given object, right-click the OpenGL view, and ‘Toggle 3D Object Information’. This makes it possible to fit the focal plane exactly.

set raytracer::size [0x0]

Sets the size of the output window. If the size is 0x0 (the default choice), the output will match the OpenGL window size. If only one dimension is specified, e.g. ‘set raytracer::size [0x600]’, the missing dimension will be calculated such that the aspect ratio of the OpenGL window will be matched. Be careful when specifying both dimensions: the aspect ratio may be different.

set raytracer::max-threads 0

This determines how many threads, Structure Synth will use during the rendering. The default value of 0, means the system will suggest an ideal number of threads. For a dual-core processor with hyper-threading, this means four threads will be used. Lower the number of threads, if you want to use the computer for other tasks, and it is unresponsive.

set raytracer::voxel-steps 30

This determines the resolution of the uniform grid used to accelerate ray intersections. Per default a simple heuristic is used to control the resolution based on the number of objects. A value of 30 means that a grid with 30x30x30 cells will be used. The uniform grid used by the raytracer is not very efficient for non-uniform structure, and will likely be replaced in a future version of Structure Synth.

set raytracer::max-depth 5

This is the maximum recursion depth of the raytracer (for transparent and reflective materials).

Finally two material settings are available:

set raytracer::reflection 0.0

Simple reflection. A value between 0 and 1.

set raytracer::phong [0.6,0.6,0.3]

The first number determines the ambient lightning, the second the diffuse, and the third the specular lightning. Diffuse and specular lightning depends on the location of the light source.

It is also possible to apply the materials to individual primitives in Structure Synth directly. This is done by tagging the objects.

Consider the following EisenScript fragment:

Rule R1 {
   { x 1 } sphere::mymaterial
   R1
}

The sphere above now belongs to the ‘mymaterial’ class, and its material settings may be set using the following syntax:

set raytracer::mymaterial::reflection 0.0
set raytracer::mymaterial::phong [0.6,0.6,0.0]

An important tip: writing these long parameter setting names is tedious and error-prone. But I’ve added a list with the most used EisenScript and Raytracer commands to the context menu in Structure Synth editor window. Just right-click and select a command.

Generative Art 2009 Conference (Milano)

This week (15-17 December) I attended the Generative Art 2009 conference in Milano, Italy. It is a conference with a quite broad and diverse focus attended by both artists and academics from many different fields. And, as far as I know, it is the only conference on Generative Art.

I do not think of myself as an artist, and neither do I work in the academia. So it was not at all obvious for me to attend the conference. But when I got a an email from Celestino Soddu (the chairman of the conference) asking me to consider participating in the conference, I became curious since the conference revolves around many of the concepts that interests me: genetic algorithms, swarms and flocking, multi-agent systems, sound synthesis, architecture, digital photography, etc…

So I went, and gave a short introduction to Structure Synth and its history (Chomsky’s formal grammars, Chris Coynes context-free design grammars, and the relation to Lindenmayer systems).

The paper is available here (PDF):
Structural Synthesis using a Context-Free Grammar Approach.


Structure Synth image.

I will start out by saying that I enjoyed the conference a lot. People were very friendly and interesting, and I had a lot of good discussions. And I think the diverse mixture of different cultures, nationalities, fields and practices is exciting – even though it also meant that some of the presentations became too tangential to my interests – and some were even nearly incomprehensible to me.

Some of my personal highlights in the conference were Arne Eigenfeldts “In Equilibrio”, a multi-agent music system, Daniel Bisig and Tatsuo Unemis “Swarms on Stage – Swarm Simulations for Dance Performance” and Philip Galanters theoretical essay on “Fitness and Complexification in Evolutionary Art” – even though I do not agree with Philip here: I think the idea of establishing an aesthetic fitness function, which could be used by genetic algorithms, is a futile endeavor. The AI community seems to have had little progress with mimicking human behavior the last forty years (e.g. see my conversation with last years Loebner prize contest winners), and surely aesthetic judgments require a lot beyond what is needed to pass a simple Turing test.


Sculpture (found somewhere in Milano).

Another highlight was Celestino Soddu’s own introduction – it contained a slideshow with an enormous amount of his own generated architectural works, and I think it demonstrated an impressive and consistent approach to generative architecture. But it also made me wonder if we will ever see a skyscraper created by a generative system.

As a final note, I also think the academic community should try to establish some sort of communication to the vibrant generative art internet community and demo scene practitioners. I am not sure exactly how this could be accomplished, but many interesting projects seems to emerge from these settings.

Structure Synth 1.0 (“Potemkin”) Released

I’ve released version 1.0 of Structure Synth.

The biggest new feature is the new Template Export GUI, which I described in a previous post. Template Export GUI highlights:

  • Shows the defined primitives in the template (highlighting used and missing ones).
  • Integrated XML editor with syntax highlighting for quickly modifying the template.
  • Automatic unique filename generation.
  • Quickly set output width and height.
  • Optional post modification window allows you to modify the output before saving.

Other new features:

  • Added a ‘Recent files’ menu entry.
  • Optional (and experimental!) depth-first recursion (using ‘set recursion depth’). This can be useful for constructive solid geometry.
  • Added an application icon.
  • Support for a new generic ‘template’ primitive

The template XML syntax has been slightly modified, and is no longer compatible with the previous format:

  • A new ‘description’ element has been introduced.
  • The ‘substitution’ element is now called ‘primitive’ (so you need to rename elements of this type).
  • Added ‘defaultExtension’ tag (for automatically suggesting file extension).
  • Added ‘runAfter’ tag (for setting a default application to spawn).

Binaries for Windows (XP and Vista).
Mac binaries (Universal build).
Linux is still source only, but if you are on Debian or Ubuntu, keep an eye out for the ‘structure-synth’ package – it will be updated to 1.0 at some point.

UPDATE 11 July: Mac binary now available.

Download at SourceForge.

Template Export GUI

I’ve added a Template Export Dialog to Structure Synth. This greatly simplifies the workflow when working with Structure Synth models.

The Template Export Dialog.

The Template Export Dialog makes it possible to browse the available templates, and see which primitives are defined in the template. The green primitives are the ones actually used in the EisenScript. If the EisenScript contains primitives not defined in the template, they will be listed as red items.

The Template Output section specifies the output filename. The default extension can be set in the template XML file (using this new defaultExtension attribute, e.g.: defaultExtension=”Sunflow scene file (*.sc)”). It is possible to automatically add a counter to the filename, to ensure that an unique file is created.

The output width and height can be changed from the dialog. The ‘/2’, and ‘*2’ buttons halves and doubles the output size, while the ‘D’ button sets the size to the size of the OpenGL window.

The Post Processing section makes it possible to specify a file with arguments, which is run after the output has been created. The $FILE$ marker will be substituted for the actual output filename before starting the process. Of course the path to the executable must be changed before using this.

It is also possible to directly modify the XML template before applying it (notice the syntax highlighting!) – this makes it easy to try out script variations. Even the final output can be modified before saving it as a file or copying it to the clipboard.

There has been a few changes to the template XML file format in order to accommodate these changes. The ‘defaultExtension’ and ‘runAfter’ tag was added, a new ‘description’ element has been introduced, and finally the ‘substitution’ element has been renamed to ‘primitive’.

The Template Export GUI will be part of Structure Synth V1.0, which I hope to release this week before I leave for my vacation.

Creating an Icon for Structure Synth

I’ve had a few requests for icons in Structure Synth. And a few people volunteering to make them. In fact I already made a couple of rough icons for Structure Synth v1.0 – but if anyone is able to improve them, please do. Suggestions may be posted to the Structure Synth Flickr pool, where I’ll choose the most suitable ones based on user comments.

Creating good icons is difficult – especially because you need something that looks good even at 16×16 pixels. Drawing an icon from scratch in a pixel based editor is not for the faint of heart. I’ve tried to do so on a couple of occasions, and the result were terrible. It is much easier to create a larger icon (preferably in a vector graphics format) and scale it to the smaller resolutions.

Icons are square bitmaps typically used with the following width and heights in pixels: 16,24,32,48,256 (Windows Vista and Mac OS 10.4 only), and 512 (Mac OS 10.5 only).

An icon file (*.ico on Windows and *.icns on Mac) may contain multiple images at different resolutions and color depths. It is not necessary to provide all possible resolutions for a given icon – the OS will automatically create the icons it need by resizing the existing bitmaps – but resizing something down to 16×16 pixels can cause severe image degradation.

For the icons I created, I started out by a very simple model made in Structure Synth, and rendered in Sunflow:

Next, I imported the image into Paint.NET – a free paint program for Windows that I can highly recommended.

For an icon to look good, it must be transparent – and not only that – any shadows must be created using the alpha-channel. In this particular case it is quite impossible to cut out the shapes without completely destroying the shadows. What I needed was to convert the black shadows (composed of colors ranging from opaque black – #000F – to opaque white – #FFFF) into colors going from opaque black into transparent black (#000F -> #0000). Turns out this was possible using the CodeLab plugin for Paint.NET. The following lines do the job:


CurrentPixel = src[x,y];
CurrentPixel.A = (byte)(255-CurrentPixel.R);
CurrentPixel.R = (byte)0;
CurrentPixel.G = (byte)0;
CurrentPixel.B = (byte)0;
dst[x,y] = CurrentPixel;

This was the most tricky part. Notice that this also makes the interior of the objects transparent – I had to fix this by masking the objects in Paint.NET. A better solution would have been to render the background in a distinct color, so that I could isolate it in the CodeLab plugin.

After that I did some post-processing to create a document icon (for the *.es EisenScript file associations). This is how the icons ended up looking:

The final step involves packaging the images files in the Icon file formats. For this I used IcoFX – a free icon editor, packed with features, and support for both Windows and Mac icons. IcoFX also contains a nice pixel editor, making it possible to clean up the low resolution 16×16 versions of the icons.